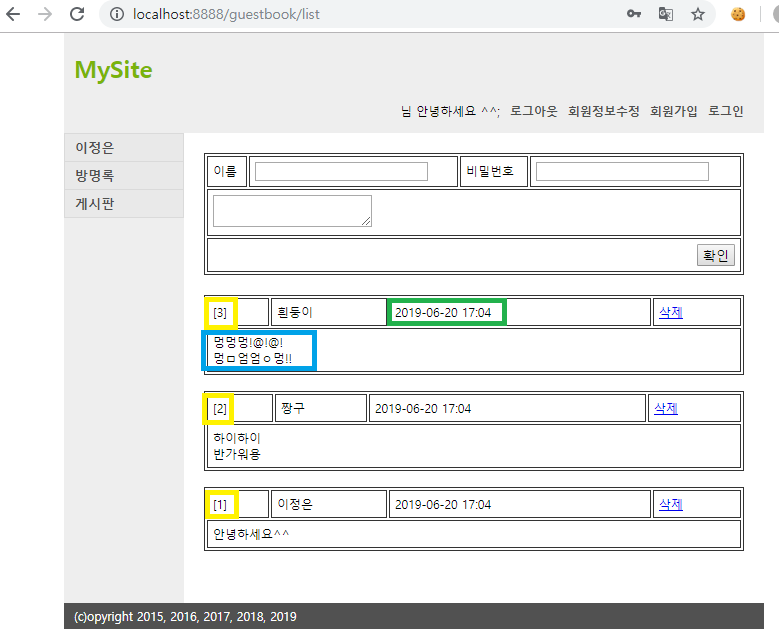
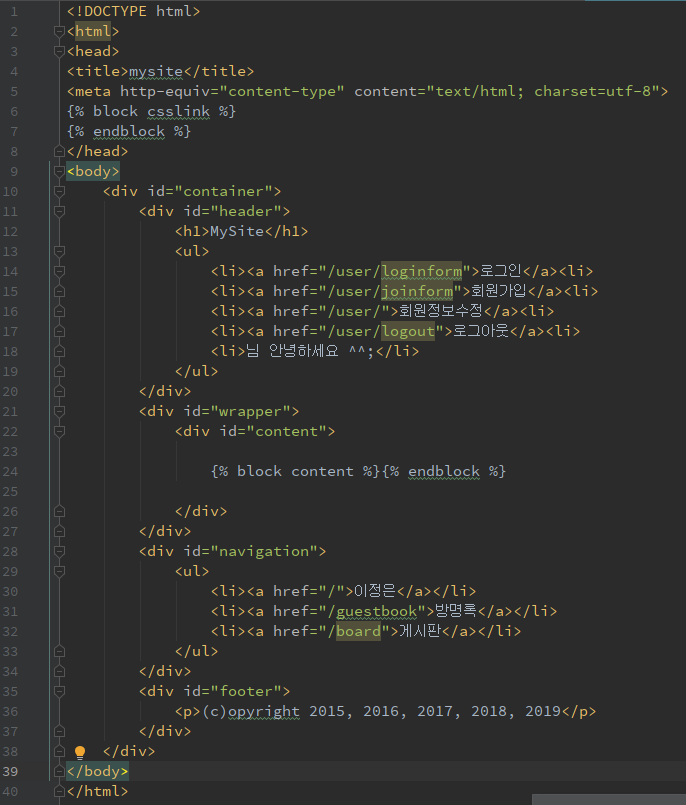
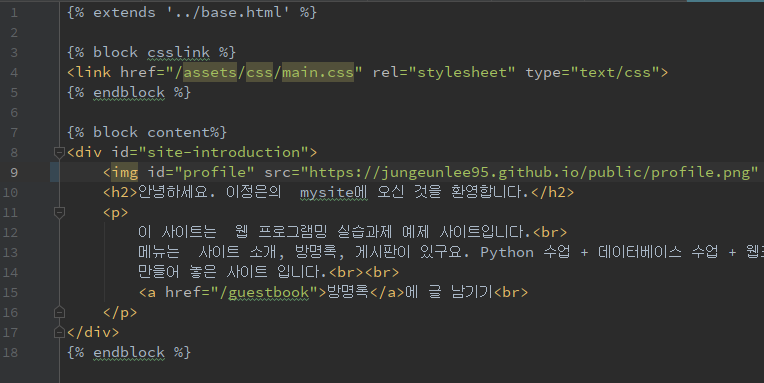
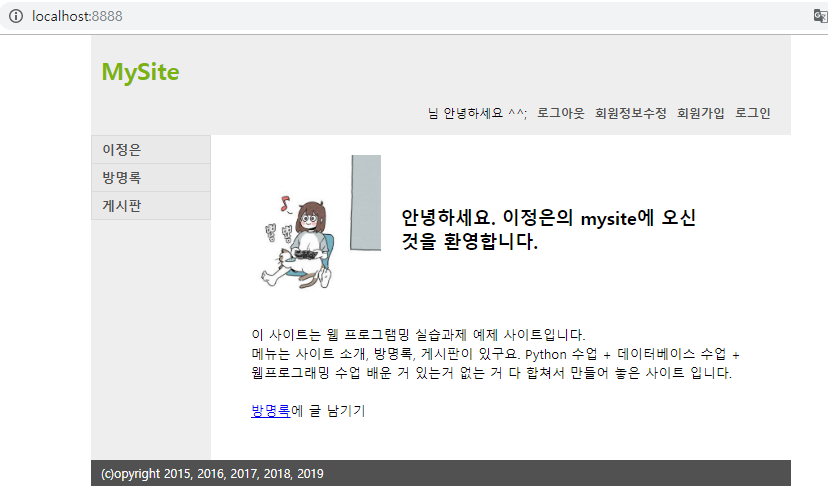
<!DOCTYPE html><html><head><title>mysite</title><metahttp-equiv="content-type"content="text/html; charset=utf-8"><linkhref="/assets/css/main.css"rel="stylesheet"type="text/css"></head><body><divid="container"><divid="header"><h1>MySite</h1><ul><li><ahref="">로그인</a><li><li><ahref="">회원가입</a><li><li><ahref="">회원정보수정</a><li><li><ahref="">로그아웃</a><li><li>님 안녕하세요 ^^;</li></ul></div><divid="wrapper"><divid="content"><divid="site-introduction"><imgid="profile"src="https://scontent-icn1-1.xx.fbcdn.net/v/t1.0-1/p240x240/30705531_2083087868372808_5261052926483232647_n.jpg?_nc_cat=0&oh=db97a9950eade94d765d2b566ff92fbc&oe=5BE17354"><h2>안녕하세요. 이정은의 mysite에 오신 것을 환영합니다.</h2><p>
이 사이트는 웹 프로그램밍 실습과제 예제 사이트입니다.<br>
메뉴는 사이트 소개, 방명록, 게시판이 있구요. Python 수업 + 데이터베이스 수업 + 웹프로그래밍 수업 배운 거 있는거 없는 거 다 합쳐서
만들어 놓은 사이트 입니다.<br><br><ahref="#">방명록</a>에 글 남기기<br></p></div></div></div><divid="navigation"><ul><li><ahref="">이정은</a></li><li><ahref="">방명록</a></li><li><ahref="">게시판</a></li></ul></div><divid="footer"><p>(c)opyright 2015, 2016, 2017, 2018, 2019</p></div></div></body></html>
<formaction="/emaillist/add"method="">
First name: <inputtype="text"name="fn"value=""><br>
Last name: <inputtype="text"name="ln"value=""><br>
Email address: <inputtype="text"name="email"value=""><br><inputtype="submit"value="submit"></form>
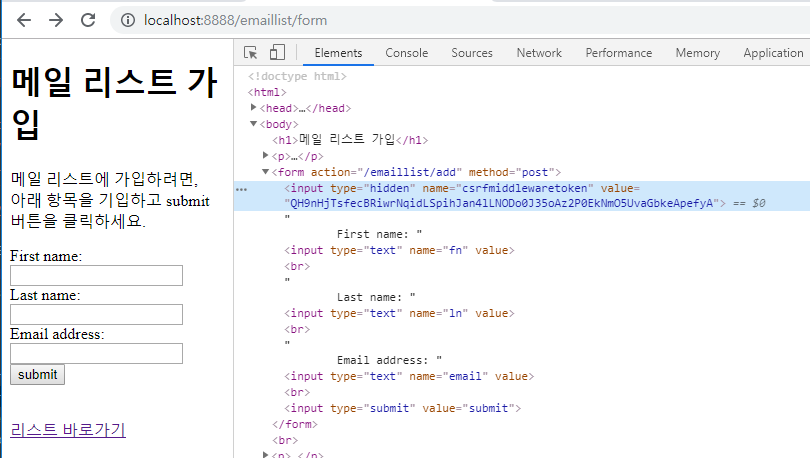
<formaction="/emaillist/add"method="post"><!-- 여기에 추가 -->
First name: <inputtype="text"name="fn"value=""><br>
Last name: <inputtype="text"name="ln"value=""><br>
Email address: <inputtype="text"name="email"value=""><br><inputtype="submit"value="submit"></form>
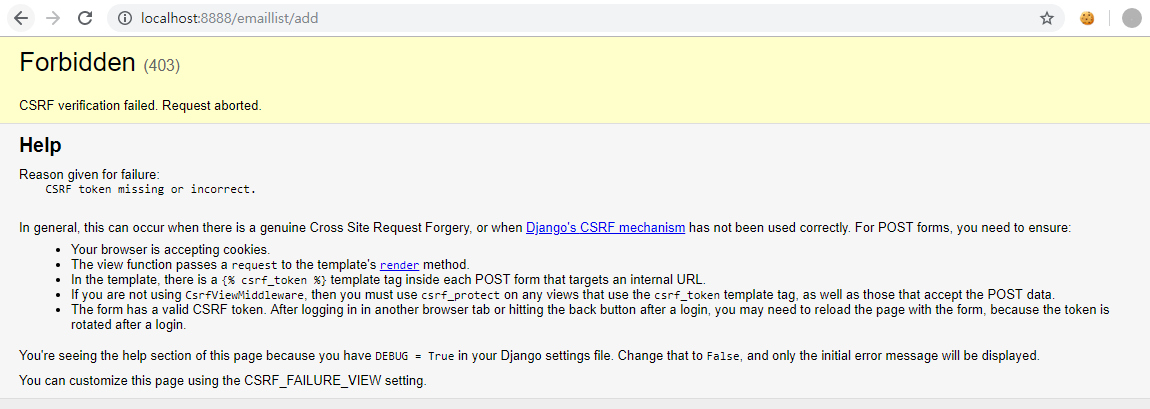
위의 코드로 처리하면 form이 있는 page에 hidden으로 CSRF데이터가 생긴다.
이 처리는 상당히 보안에 취약하다.
해당 페이지의 html을 파싱해서 페이지의 csrfmiddlewaretoken값의 value를 가져와 form data와 함께 전송하면, 여전히 공격을 받기 쉬운 처리이다.
이는 장고를 좀 더 공부한 뒤, 좀 더 보안적으로 처리해보도록 하자
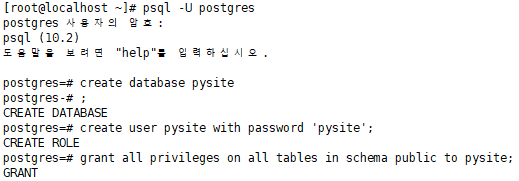
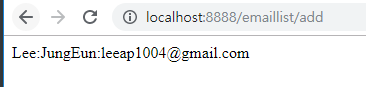
일단 토큰 처리를 마쳤으니, 다시 접근
성공!
[2] 받은 data, DB에 insert하기
emaillist/views.py
fromemaillist.modelsimportEmaillistfromdjango.httpimportHttpResponseRedirectdefadd(request):emaillist=Emaillist()emaillist.first_name=request.POST['fn']emaillist.last_name=request.POST['ln']emaillist.email=request.POST['email']emaillist.save()# insert 후에는 꼭 redirect 처리!
returnHttpResponseRedirect('/emaillist')
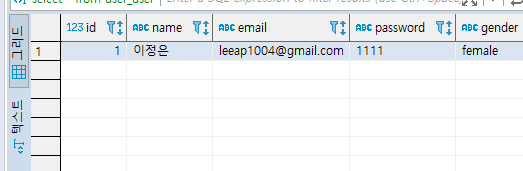
http://localhost:8888/emaillist/form에서 submit을 한 뒤
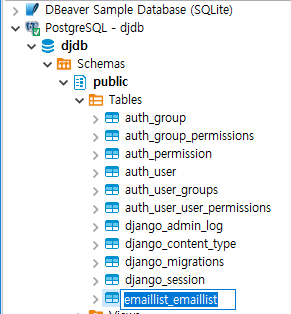
DBeaver에서 확인해보기
성공!
[3] DB data select 가져오기
sample data를 몇 개 넣어보고 확인해보자!
emaillist/views.py
index에서 모든 데이터를 select해와서 list보여주기!
defindex(request):emaillist=Emaillist.objects.all().order_by('-id')# for email in emaillist:
# print(email)
data={'emaillist':emaillist}returnrender(request,'emaillist/index.html',data)
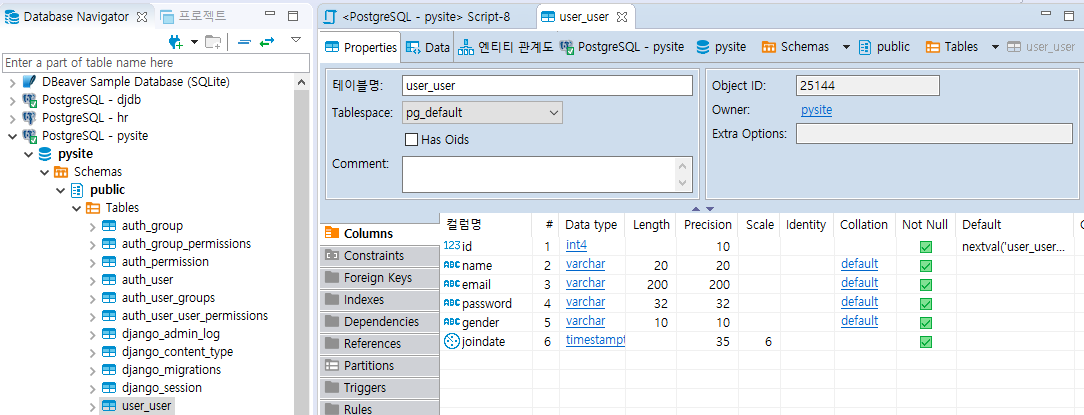
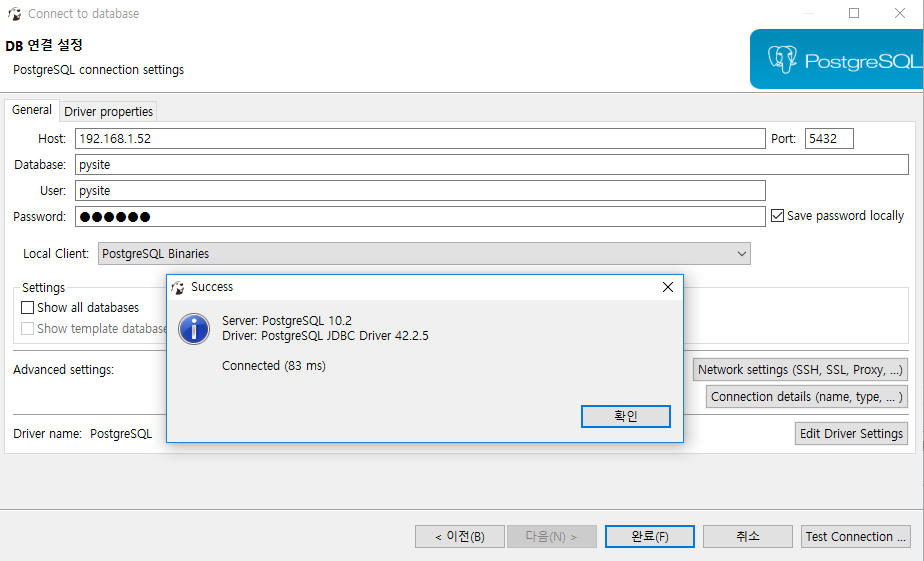
기본적으로 장고 프로젝트 한 개당 한 개의 DB를 사용한다.
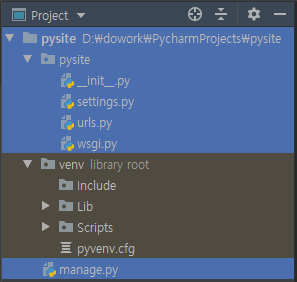
Application 작업 순서
1. 어플리케이션 추가
[터미널]
python manage.py startapp 앱이름
2. 어플리커이션 등록 (settings.py)
INSTALLED_APPS = [
'앱이름',
...,
]
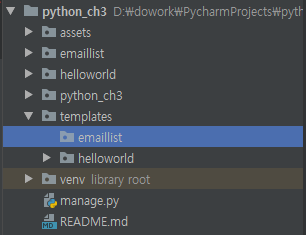
3. template
|--- 앱이름
어플리케이션 template 디렉토리 생성
4-1. Model 정의 (db:postgresql 사용)
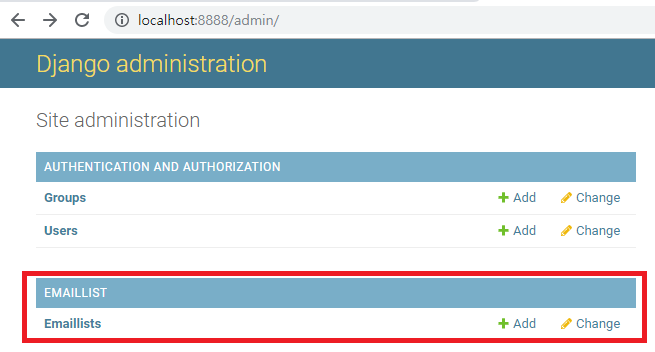
4-2. admin.py에 모듈 추가
4-3. migrations 이름의 DDL python 모듈 생성
4-4. 물리DB와 스키마 동기화 작업
5. urls.py에서 url-view의 handler 매핑
6. views.py에서 핸들러 함수 구현(요청처리, 모델작업)
7. 화면이 필요한 경우, 해당 template 작업
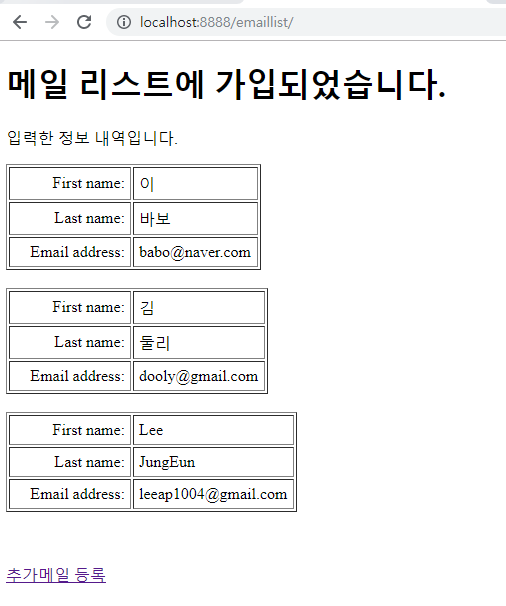
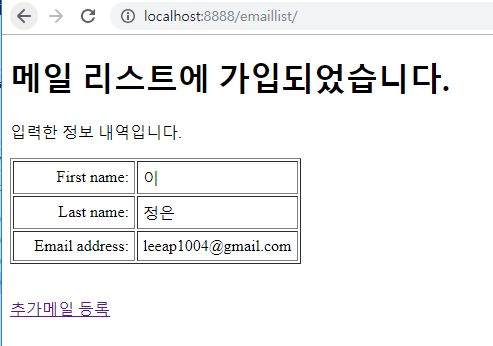
<!DOCTYPE html><html><head><metahttp-equiv="Content-Type"content="text/html; charset=UTF-8"><title>Insert title here</title></head><body><h1>메일 리스트에 가입되었습니다.</h1><p>입력한 정보 내역입니다.</p><!-- 메일정보 리스트 --><tableborder="1"cellpadding="5"cellspacing="2"><tr><tdalign=right>First name: </td><td>이</td></tr><tr><tdalign=rightwidth="110">Last name: </td><tdwidth="110">정은</td></tr><tr><tdalign=right>Email address: </td><td>leeap1004@gmail.com</td></tr></table><br><p><ahref="/emaillist/form">추가메일 등록</a></p><br></body></html>
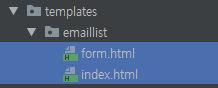
form.html
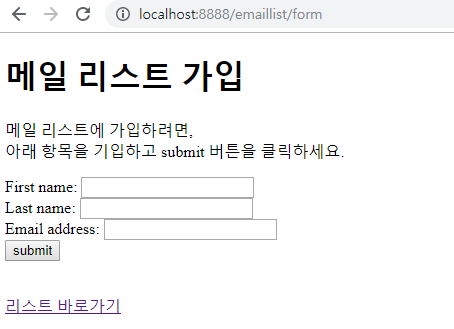
<!DOCTYPE html><html><head><metahttp-equiv="Content-Type"content="text/html; charset=UTF-8"><title>Insert title here</title></head><body><h1>메일 리스트 가입</h1><p>
메일 리스트에 가입하려면,<br>
아래 항목을 기입하고 submit 버튼을 클릭하세요.
</p><formaction=""method="">
First name: <inputtype="text"name="fn"value=""><br>
Last name: <inputtype="text"name="ln"value=""><br>
Email address: <inputtype="text"name="email"value=""><br><inputtype="submit"value="submit"></form><br><p><ahref="/emaillist">리스트 바로가기</a></p></body></html>

 콩정의 개발 정리 블로그