
 콩정의 개발 정리 블로그
4 Javascript 객체 이해 / DOM, BOM 내용 정리
05 Jul 2019 | Javascript DOM BOM
자바스크립트 객체는 3개로 분류할 수 있다.
-
Native opject (Built-in object, core object)
- 애플리케이션의 환경과 관계없이 언제나 사용할 수 있는 애플리케이션 전역의 공통 기능을 제공한다.
- Object, String, Number, Function, Array, RegExp, Date, Math와 같은 객체 생성에 관계가 있는 함수 객체와 메소드로 구성된다.
-
호스트 객체
- 브라우저 환경에서 객체를 말한다.
- window, XmlHttpRequest, HTMLElement 등의 DOM 노드 객체와 같이 호스트 환경에 정의된 객체
-
사용자 정의 객체
🧐 Javascript Date 객체
// 현재시간
var now = new Date();
console.log(now, typeof now);

// 2019년 7월 5일
// month = current month -1
var d = new Date(2019, 6, 5);
console.log(d);

// 2019년 7월 5일 12:30:40
var d = new Date(2019, 6, 5, 12, 30, 40);
console.log(d);

// 객체 메서드
console.log(
    // " 년:" + (d.getYear() + 1900) + "\n" +
    " 년:" + (d.getFullYear()) + "\n" +
    " 월:" + (d.getMonth() + 1) + "\n" +
    " 일:" + d.getDate() + "\n" +
    " 요일:" + ['일', '월', '화', '수', '목', '금', '토'][d.getDay()] + "\n"+
    " 시:" + d.getHours() + "\n" +
    " 분:" + d.getMinutes() + "\n" +
    " 초:" + d.getSeconds() + "\n" +
    " 밀리초:" + d.getMilliseconds()
)

d.setYear(2020);
console.log(d.getFullYear());
d.setMonth(11); // 12월
console.log(d.getMonth()+1);
Fri Jul 05 2019 09:41:26 GMT+0900 (Korean Standard Time) “object”
Fri Jul 05 2019 00:00:00 GMT+0900 (Korean Standard Time)
Fri Jul 05 2019 12:30:40 GMT+0900 (Korean Standard Time)
년:2019
월:7
일:5
요일:금
시:12
분:30
초:40
밀리초:0
2020
12
🧐 Javascript function 객체
- JavaScript 함수 생성하는 방법
// 함수 객체 생성하는 방법1 - 잘 사용하지 않음
function f1(a, b){
    return a+b;
}
console.log(f1(10, 20));

// 함수 객체 생성하는 방법2 - 잘 사용하지 않음
var f2 = Function("a", "b", "var sum = a+b; return sum;");
console.log(f2(10, 20));
- JavaScript Anonymous Function - 익명함수
	// Anonymous Function - 익명함수
	// 함수 객체 생성하는 방법3
	var f3 = function(a, b){
		return a+b;
	}
	console.log(f3(10, 20));

	// 변수에 바로 할당하고 변수를 호출하면 함수가 실행
	var sum = (function(a,b){
		var s = a + b; // 여기서만 사용하고 사라지는 함수
		return s;
	})(10, 20); // 즉시실행함수
	console.log(sum);
- JavaScript 가변함수 파라미터 받기
- (a=10, b=20)형식과 같이 기본적으로 명시된 함수 인자 말고, 정해지지 않는 개수만큼 변수 받기
- 기본으로 받는 함수 인자 : this, arguments
var sum = function(){
    console.log(arguments)
}
sum(10);
sum(10, 20);
sum(10, 20, 30, 40, 50);
sum(10, 20, 30, 40, 50, 60, 70, 80);
Arguments [10, callee: ƒ, Symbol(Symbol.iterator): ƒ]
Arguments(2) [10, 20, callee: ƒ, Symbol(Symbol.iterator): ƒ]
Arguments(5) [10, 20, 30, 40, 50, callee: ƒ, Symbol(Symbol.iterator): ƒ]
Arguments(8) [10, 20, 30, 40, 50, 60, 70, 80, callee: ƒ, Symbol(Symbol.iterator): ƒ]
가변함수 합 구하는 함수 만들기
// 1
var sum = function(){
    var sum = 0;
    for(var i = 0; i < arguments.length; i++){
        sum += arguments[i];
    }
    return sum;
}

// 2
var sum = function(){
    var sum = 0;
    Array.prototype.forEach.call(arguments, function(n){// this=arguments
        // console.log(n); // arguments의 파라미터들
        sum += n;
    });
    return sum;
}

console.log(sum(10));
console.log(sum(10, 20));
console.log(sum(10, 20, 30, 40, 50));
console.log(sum(10, 20, 30, 40, 50, 60, 70, 80));
- JavaScript anonymous parameter : 익명 파라미터
[1] 연습
var f = function(arg1, arg2, arg3){
    console.log(arg1); // == console.log(arguments[0]);
    console.log(arg2); // == console.log(arguments[1]);
    arg3();			   // == arguments[2]();
}

f(10, {
    name : '둘리',
    age : 10
}, function(){
    console.log('hello');
});
10
{name: “둘리”, age: 10}
hello
[2] 연습
b = new Array(10, 20, 30);
console.log(b); // (3) [10, 20, 30]

Array = function(){
    var a = [];
    for(var i = 0; i<arguments.length; i++){
        this.a[i] = arguments[i];
    }
    return a;
}
🧐 Javascript BOM(Browser Object Model) 정리
- 자바스크립트가 브라우저와 소통하기 위한 모델이다.
- 웹 브라우저 창을 관리할 목적으로 메소드와 속성으로 동작한다.
- 웹 브라우저 창을 관리할 목적으로 제공되는 객체 모음을 대상으로 하는 모델이다.
- BOM의 역할은 웹 브라우저의 버튼, URL 주소입력창, 타이틀 바 등 웹 브라우저 윈도우 및 웹 페이지의 일부분을 제어할 수 있게하는 윈도우 객체 모델이다.
[1] - Window 전역 객체
윈도우 객체 확인
var s = '';
for(var key in window){
    s += (key + ' : ' + window[key] + '\n')
}
console.log(s);
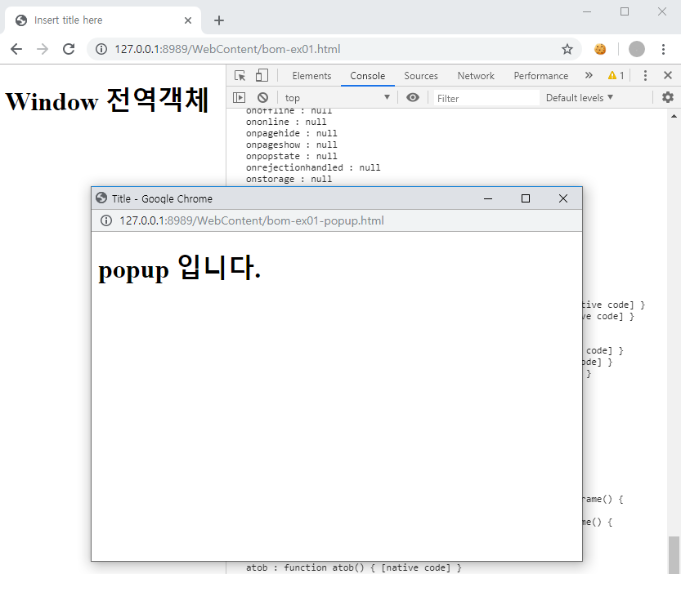
새로운 window 객체 생성 - 팝업창
// 새로운 window 객체 생성
setTimeout(function(){
    window.open('bom-ex01-popup.html', 'popup', 'width=600, height=400', true);
}, 2000);
bom-ex01-popup.html
<h1>popup 입니다.</h1>
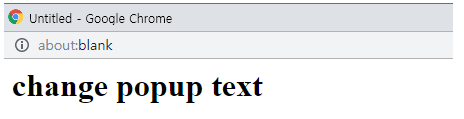
popup 내용 바꾸기
setTimeout(function(){
    var popup= window.open('bom-ex01-popup.html', 'popup', 'width=600, height=400', true);
    popup.document.write('<h1>change popup text</h1>');
}, 2000);
같은 domain의 alert창 띄워보기
setTimeout(function(){
    var popup= window.open('bom-ex01-popup.html', 'popup', 'width=600, height=400', true);

    setTimeout(function(){
        popup.pop();
    }, 1000);

}, 2000);
bom-ex01-popup.html
<head>
<script>
    var pop = function(){
        alert('hihi!!!');
    }
</script>
</head>
<body>
    <h1>popup 입니다.</h1>
</body>

자식 창의 스크립트도 실행 : moveTo
단, 보안상 cross-domain 문제 때문에 같은 domain에서만 가능하다.
setTimeout(function(){
    var popup= window.open('bom-ex01-popup.html', 'popup', 'width=600, height=400', true);

    popup.moveTo(0, 0);
    setTimeout(function(){
        popup.pop();
    }, 1000);

    setTimeout(function(){
        popup.moveTo(100, 100);
    }, 2000); // 2초뒤에 팝업창 위치 이동

}, 2000);
[2] - Screen 객체
window의 사이즈와 위치 조정도 가능하다. (잘 쓰지 않음)
// 팝업창
var child = window.open('','','width=300, height=300', true);

// 현재 윈도우 스크린
var width = screen.width;
var height = screen.height;

console.log(width + ' : ' + height);

// 팝업창을 현재 윈도우 스크린 크기만큼 늘림
child.moveTo(0, 0);
child.resizeTo(width, height);

setInterval(function(){
    // 0.5초마다 사이즈 줄이고 위치 가운데로
    child.resizeBy(-20, -20);
    child.moveBy(10,10);
}, 500);
[3] - location 객체 [주소창]
객체 확인해보기
var s = '';
for (var key in location){
    s += (key + ":" + location[key] + '\n')
}
console.log(s);
page refresh 방법
<!-- refresh 방법1 -->
<button onclick="location = location;">refresh1</button>

<!-- refresh 방법2 -->
<button onclick="location.href = location.href;">refresh2</button>

<!-- refresh 방법3 -->
<button onclick="location.assign('');">refresh3</button>

<!-- refresh 방법4 -->
<button onclick="location.replace(location);">refresh4</button>

<!-- refresh 방법5 -->
<button onclick="location.reload();">refresh5</button>
[4] - navigator 객체
객체 확인해보기
var s = '';
for (var key in navigator){
    s += (key + ":" + navigator[key] + '\n')
}
console.log(s);
브라우저 정보 확인
<script src='browser-detect.js'></script>
<script !src="">
	var s = '';
	for (var key in navigator){
		s += (key + ":" + navigator[key] + '\n')
	}
	// console.log(s);

	BrowserDetect.init();
	console.log(BrowserDetect.browser);
	console.log(BrowserDetect.version);
	console.log(BrowserDetect.OS);
</script>
Chrome
75
Windows
🧐 Javascript DOM(Document Object Model) 정리
용어 정리
1. 태그(Tag)
	- HTML 문서 안에서 텍스트나, 콘텐츠를 정의할 때 사용하는 마크업
2. 문서 객체(document object)
	- DOM(Document Object Model, Tree)이 구성된 다음 노드의 타입(HTMLElement)
	- JS에서 접근하고 조작하는 것
3. 노드(Node)
	- Dom Tree 각각의 요소
순서
<script>alert('step-0');</script>
</head>
<body>
    <h1>step-1</h1>
    <script>alert('step-2');</script>
    <h1>step-3</h1>
    <script>alert('step-4');</script>
</body>
순서가 보장되지 않음(자바스크립트 실행 속도가 더 빠름) - alert를 믿지말자!
DOM loading 완료 시점
window.onload = function () {
    // DOM loading 완료가 된 시점(body가 다 구성된 후)
    console.log(document.getElementById('header-1'));
}
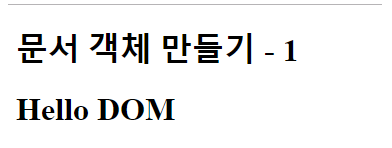
[1] - 문서 객체 만들기 - 1
<head>
<script>
	window.onload = function(){
		var header = document.createElement('h1');
		var textNode = document.createTextNode('Hello DOM');
		header.append(textNode);

		setTimeout(function () {
			document.body.appendChild(header);
		}, 2000);
	}
</script>
</head>
<body>
	<h1>문서 객체 만들기 - 1</h1>
</body>
[2] - 문서 객체 만들기 - 2
<head>
<script>
	window.onload = function(){

		var html = "";
		html += "<ul>";
		html += "<li>JavaScript</li>";
		html += "<li>JQuery</li>";
		html += "<li>ES6</li>";
		html += "<li>React.js</li>";
		html += "</ul>";

		setTimeout(function () {
			document.body.innerHTML += html;
		}, 2000);
	}
</script>
</head>
<body>
	<h1>문서 객체 만들기 - 2</h1>
</body>
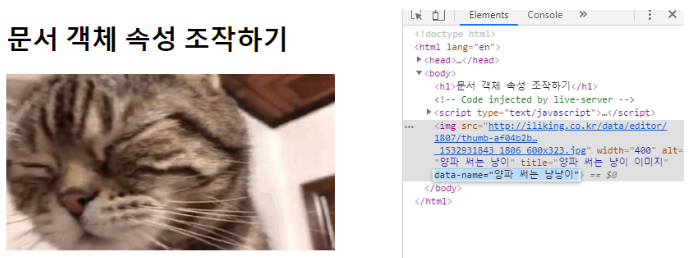
[3] - 문서 객체 속성 조작하기
표준 속성
표준 속성은 문서 객체로 설정이 가능하다.
<head>
<script>
	window.onload = function(){
		var img = document.createElement('img');
		setTimeout(function () {
			document.body.appendChild(img);

			img.src = 'http://iliking.co.kr/data/editor/1807/thumb-af04b2b5dd8d05d65f037749593ca639_1532931843_1806_600x323.jpg';
			img.width = 400;
			img.alt = '양파 써는 냥이';
			img.title = '양파 써는 냥이 이미지'

		}, 2000);
	}
</script>
</head>
<body>
	<h1>문서 객체 속성 조작하기</h1>
</body>

비표준 속성 .setAttribute()
비표준 속성까지 설정하기 위해서는 메소드를 사용한다.
<head>
<script>
	window.onload = function(){
		var img = document.createElement('img');

		setTimeout(function () {
			document.body.appendChild(img);
            img.setAttribute('src','http://iliking.co.kr/data/editor/1807/thumb-af04b2b5dd8d05d65f037749593ca639_1532931843_1806_600x323.jpg');
			img.setAttribute('width', 400);
			img.setAttribute('alt', '양파 써는 냥이');
			img.setAttribute('title', '양파 써는 냥이 이미지');
			img.setAttribute('data-name', '양파 써는 냥냥이');
		}, 2000);
	}
</script>
</head>
<body>
	<h1>문서 객체 속성 조작하기</h1>
</body>
[4] - 문서 객체 값 가져오기 (탐색)
1) 문서 객체 아이디로 가져오기
<script>
	window.onload = function(){
		var header1 = document.getElementById('header-1');
		var header2 = document.getElementById('header-2');

		setTimeout(function () {
			header1.innerText = 'by getElementById()';
			header2.innerText = 'by getElementById()';
		}, 1000);
	}
</script>
<body>
	<h1>문서 객체 가져오기 - 1</h1>
	<h1 id="header-1">Header</h1>
	<h1 id="header-2">Header</h1>
</body>
2) 문서 객체 태그 이름으로 가져오기
반드시 document 객체를 사용해서 DOM 전체에서 탐색할 필요는 없다.
document 객체 대신에 부모 문서 객체로
getElementsByTagName메소드 호출이 가능하다.
<script>
	window.onload = function(){
		var headers = document.getElementsByTagName('h2');

		setTimeout(function () {
			headers[0].innerText = 'by getElementsByTagName';
			headers[1].innerText = 'by getElementsByTagName';
		}, 1000);
	}
</script>
<body>
	<h1>문서 객체 가져오기 - 2</h1>
	<h2>Header</h2>
	<h2>Header</h2>
</body>
3) 문서 객체 클래스로 가져오기
<script>
	window.onload = function(){
		var headers = document.getElementsByClassName('header');

		setTimeout(function () {
			headers[0].innerText = 'by getElementsByClassName';
			headers[1].innerText = 'by getElementsByClassName';
		}, 1000);
	}
</script>
<body>
	<h1>문서 객체 가져오기 - 3</h1>
	<h2 class="header">Header</h2>
	<h2 class="header">Header</h2>
</body>
4) 문서 객체 css 선택자(selector)로 가져오기 (html5부터 지원)
<script>
	window.onload = function(){
		var header1 = document.querySelector('#header-1'); // id
		var headers = document.querySelectorAll('.header'); // class

		setTimeout(function () {
			header1.innerText = 'by querySelector()';
			headers[1].innerText = 'by querySelectorAll()';
		}, 1000);
	}
</script>
<body>
	<h1>문서 객체 가져오기 - 3</h1>
	<h2 id='header-1' class='header'>Header</h2>
	<h2 id='header-2' class='header'>Header</h2>
</body>