 콩정의 개발 정리 블로그
Django-mysite만들기6 ajax를 이용한 아이디 중복 체크
22 Jun 2019 | django python django-ormdjango mini project
cafe24신입사원 교육과정 - django 수업 내용 정리
[1] json data 받기 연습
json 데이터 받는 연습을 위해, 임시로 urls.py에
path('helloworld/hello3/', helloworld_views.hello3), url을 추가한다.
views.py
def hello3(request):
    # 전송할 json 데이터
    jsonresult = {
        'result' : 'success',
        'data' : ['hello', 1, 2, True, ('a','b','c')]
    }

    # 바로 브라우저에 띄우기
    return JsonResponse(jsonresult)

브라우저에서 확인하기 json데이터 받는 것 확인 완료!
[2] email 중복체크 구현하기
django jquery 라이브러리 다운로드
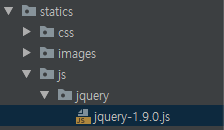
나의 경우, settings.py에서 static 디렉토리의 경로를
STATIC_URL = '/assets/'
위 코드와 같이 지정했기 때문에,
html파일에서 제이쿼리를 로드하기 위해서 아래의 코드를 적어주면 된다.
<script src="/assets/js/jquery/jquery-1.9.0.js"></script>
잠깐 자바스크립트 함수 호출 방법을 연습!
function f(){
    console.log("hello~")
}
$(f);
$(function(){
    console.log("hello~")
});
f = function(){
    console.log("hello~")
}
$(f);
다 같은 코드로 함수가 실행된다.
이메일 중복 구현 - jquery, ajax
[1] urls.py path 추가
ajax를 통해 email 중복 체크를 할 urls를 매핑해준다.
path('user/api/checkemail', user_views.checkemail),
[2] views.py - 해당 이메일의 객체 존재 여부 체크
def checkemail(request):
    try:
        user = User.objects.get(email=request.GET['email'])
    except Exception as e:
        user = None
    result = {
        'result':'success',
        # 'data' : model_to_dict(user)  # console에서 확인
        'data' : "not exist" if user is None else "exist"
    }
    return JsonResponse(result)
get 파라미터를 통해 email 데이터를 받아, DB에 그 email과 일치하는 데이터가 있는지 확인 후, result를 return해준다.
[3] ajax 처리
joinform.html
<script>
/* 중복체크! */
$(function(){
$('#btn-email').click(function(){
var email = $('#email').val()
if(email == ''){
alert('이메일을 입력해주세요.')
return;
}
$.ajax({
url:'/user/api/checkemail?email='+email,
type:'get',
dataType:'json',
success:function(response){
if(response.result != 'success'){
console.error(response.data)
return;
}
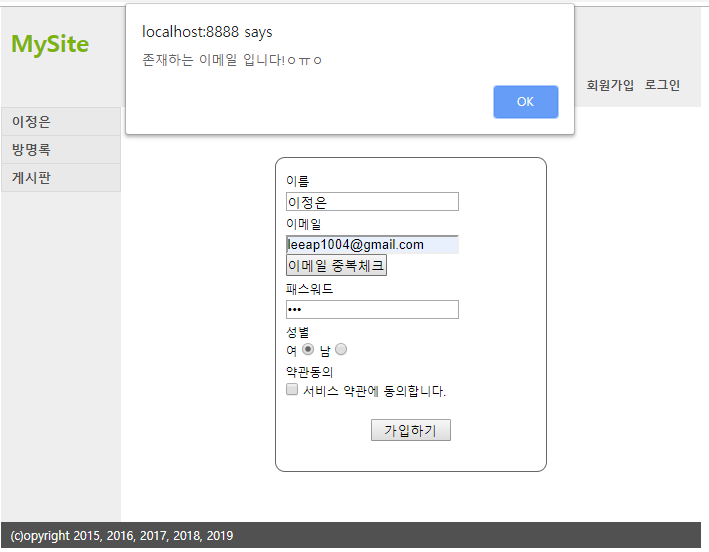
if(response.data == 'exist'){
alert("존재하는 이메일 입니다!ㅇㅠㅇ");
$('#email').val('').focus();
return;
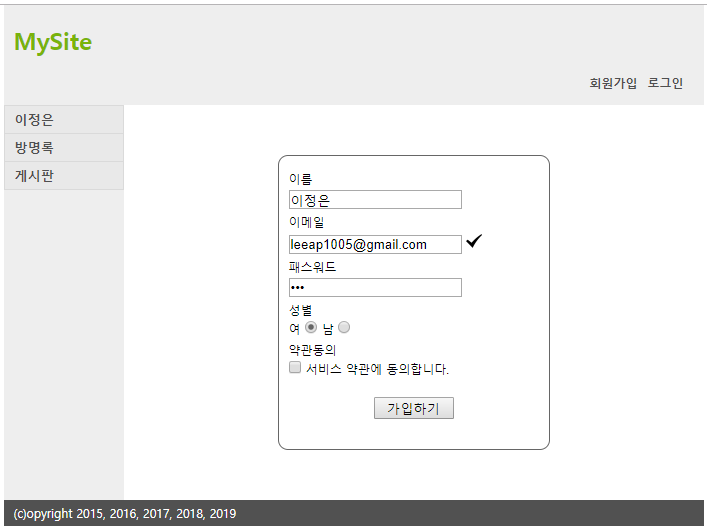
}else{
$('#img-email').show();
$('#btn-email').hide();
return;
}
},
error : function(xhr, error){
alert("서버와의 통신에서 문제가 발생했습니다.");
console.error("error : " + error);
}
})
});
</script>
위의 자바스크립트 코드를 통해, 비동기적 통신으로 중복체크를 가능하게 했다.
joinform.html
<form id="join-form" name="joinForm" method="post" action="/user/join">

    [..코드 생략..]

	<label class="block-label" for="email">이메일</label>
	<input id="email" name="email" type="text" value="">
	<img id="img-email" src="/assets/images/check.png" style="display:none;">
	<input id="btn-email" type="button" value="이메일 중복체크">

    [..코드 생략..]

	<input type="submit" id="join-submit" id_check_result="fail" value="가입하기">
</form>
[4] 중복체크 후 input data를 수정한 경우
중복체크 후 input의 value를 수정한 경우, 다시 중복체크를 하도록 처리를 해야한다.
$('#email').change(function () {
    $('#img-email').hide();
    $('#btn-email').show();
});
id=email인 input이 수정되었을 때, 다시 이메일을 체크하도록 ui변경
$("#join-submit").attr("id_check_result", "success");
이메일 중복체크를 성공한 경우 submit의 어트리뷰트 값을 변경시킨다.
$('#join-form').submit(function() {
    if($("#join-submit").attr("id_check_result") == "fail") {
        alert("id 중복체크를 해주시기 바랍니다.");
        $("#email").focus();
        return false;
    }
});

$("#email").on("propertychange change keyup paste input", function(){
    $('#img-email').hide();
    $('#btn-email').show();
    $("#join-submit").attr("id_check_result", "fail");
});
만약, submit의 어트리뷰트가 fail인 경우, 다시 중복체크 하도록 처리한다.
브라우져의 개발자 모드 어트리뷰트를 변경한 경우 넘어갈 수 없도록
propertychange change keyup paste input,
$("#join-submit").attr("id_check_result", "fail");코드를 추가했다.
javascript 전체 코드
<script>
	/* 중복체크! */
	$(function(){
		/* 아이디 수정했을 때 */
		$('#email').change(function () {
			$('#img-email').hide();
			$('#btn-email').show();
		});

		$('#btn-email').click(function(){
			var email = $('#email').val()
			if(email == ''){
				alert('이메일을 입력해주세요.')
				return;
			}

			$.ajax({
				url:'/user/api/checkemail?email='+email,
				type:'get',
				dataType:'json',
				success:function(response){
					if(response.result != 'success'){
						console.error(response.data)
						return;
					}
					if(response.data == 'exist'){
						alert("존재하는 이메일 입니다!ㅇㅠㅇ");
						$('#email').val('').focus();
						return;
					}else{
						$('#img-email').show();
						$('#btn-email').hide();
						$("#join-submit").attr("id_check_result", "success");
						return;
					}
					// console.log(response)
				},
                error : function(xhr, error){
					alert("서버와의 통신에서 문제가 발생했습니다.");
					console.error("error : " + error);
				}
			})
		});

    $('#join-form').submit(function() {
		   if($("input:checkbox[id='agree-prov']").is(":checked") == false) {
		      alert("약관동의를 확인하여 주시기 바랍니다.");
		      return false;
		   }

		   console.log($("#join-submit").attr("id_check_result"));

		   if($("#join-submit").attr("id_check_result") == "fail") {
		      alert("id 중복체크를 해주시기 바랍니다.");
		      $("#email").focus();
		      return false;
		   }
		});

		$("#email").on("propertychange change keyup paste input", function(){
		   $('#img-email').hide();
		   $('#btn-email').show();
		   $("#join-submit").attr("id_check_result", "fail");
		});
	});
</script>